
A delicious dessert recipe from British cuisine. For the biscuits, preheat the oven to 200C/180C (fan)/Gas 6 and line two large baking trays with baking parchment. Scatter the nuts over a baking tray and roast…
SALTAR A:
mostrar
A delicious dessert recipe from British cuisine. For the biscuits, preheat the oven to 200C/180C (fan)/Gas 6 and line two large baking trays with baking parchment. Scatter the nuts over a baking tray and roast...

How to easily make Blackberry Fool?
Preparing this delicious recipe will only take you 30 minutes. It is a perfect and healthy option to enjoy with your family or friends. Below you will find the ingredients and the detailed step-by-step instructions.

Blackberry Fool
A delicious dessert recipe from British cuisine. For the biscuits, preheat the oven to 200C/180C (fan)/Gas 6 and line two large baking trays with baking parchment. Scatter the nuts over a baking tray and roast...
Ingredientes
- 50g Hazlenuts
- 125g Butter
- 150g Caster Sugar
- Grated Lemon
- 150g Plain Flour
- ½ tsp Baking Powder
- 600g Blackberries
- 75g Sugar
- 2 tbs Caster Sugar
- 1 tbs Lemon Juice
- 300ml Double Cream
- 100ml Yogurt
- Garnish with Mint
Instrucciones
- For the biscuits, preheat the oven to 200C/180C (fan)/Gas 6 and line two large baking trays with baking parchment. Scatter the nuts over a baking tray and roast in the oven for 6-8 minutes, or until golden-brown. Watch them carefully so that they don’t have a chance to burn. Remove from the oven, tip onto a board and leave to cool.
- Put the butter and sugar in a large bowl and beat with a wooden spoon until light and creamy. Roughly chop the cooled nuts and add to the creamed butter and sugar, along with the lemon zest, flour and baking powder. Stir well until the mixture comes together and forms a ball – you may need to use your hands.
- Divide the biscuit dough into 24 even pieces and roll into small balls. Place the balls the prepared baking trays, spaced well apart to allow for spreading.
- Press the biscuits to flatten to around 1cm/½in thick. Bake the biscuits, one tray at a time, for 12 minutes or until very pale golden-brown. Leave to cool on the trays. They will be very soft when you take them out of the oven, but will crisp as they cool.
- Store in an airtight tin and eat within five days.
- For the fool, rinse the blackberries in a colander to wash away any dust or dirt. Put the blackberries in a non-stick saucepan and sprinkle over the caster sugar.
- Stir in the lemon juice and heat gently for two minutes, or until the blackberries begin to soften and release their juices. Remove and reserve 12 blackberries for decoration and continue cooking the rest.
- Simmer the blackberries very gently for 15 minutes, stirring regularly until very soft and squidgy. Remove from the heat and press the berries and juice through a sieve over a bowl, using the bottom of a ladle to help you extract as much of the purée as possible. Leave the purée to cool and discard the seeds. You should end up with around 325ml/11fl oz of purée.
- Put the cream and yoghurt in a large bowl and whip with an electric whisk until soft peaks form when the whisk is removed from the bowl – the acidity of the fruit will thicken the cream further, so don’t take it too far.
- When the purée is completely cold, adjust the sweetness to taste by adding more sugar if needed. Pour it into the bowl with the whipped cream and yoghurt and stir just once or twice until very lightly combined.
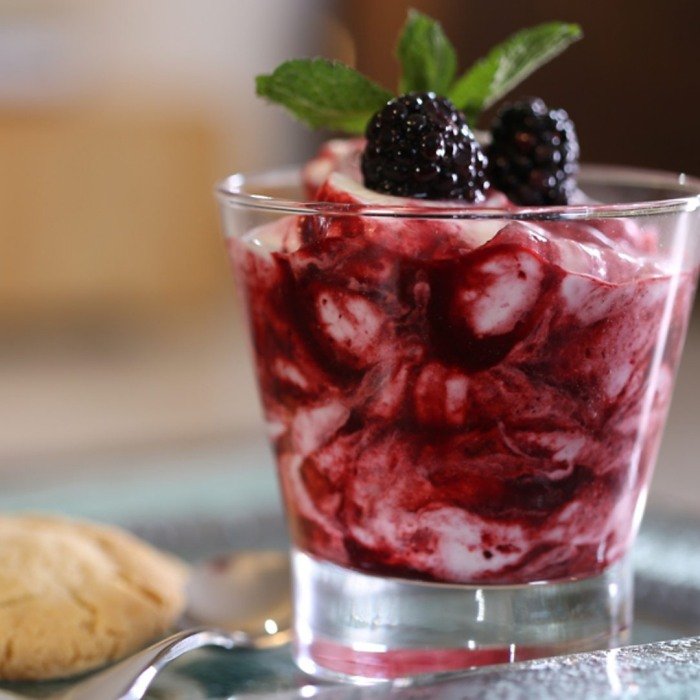
- Spoon the blackberry fool into individual wide, glass dishes – or one large, single bowl. It should look quite marbled, so don’t over-stir it. Scatter a few tiny mint leaves on top and decorate with the reserved blackberries. Sprinkle with a little sugar if you like and serve with the hazelnut biscuits.
Preparaste esta receta?Califica esta receta y deja un comentario
Additional tips for your Blackberry Fool
Feel free to experiment with different spices or side dishes to give your personal touch to this recipe. If you liked it, don’t forget to share it and leave us a comment telling us how it turned out!
